Basic Quilting Skills | Nesting Seams
After sewing two fabric pieces together and pressing them open with seams to the darker fabric, follow the diagrams below to nest your seams.

The more accurately you nest the seams in each unit of each block, the better your seams will match on the top of your quilt.
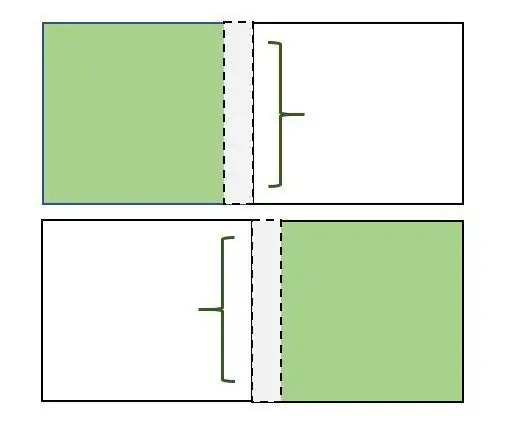
Flip the top unit right-side up.


Place the bottom unit (wrong side up) on top of the other unit that is right-side up. The seam of the unit closest to you should fall to the right. The seam of the unit on the bottom will fall to the left. Now hold the fabrics together with your thumb and forefinger on either side of the fabric where the two seams meet. Gently press and shift the sewn units between your fingers until the seams lay flat and are nested against one another (no gaps in between the seams and no overlapping). Insert a pin to hold the units together while you sew.
Sew a scant 1/4-inch seam along the top edge of this new unit.
If the short edges of the units do not match up exactly, that is fine. The important part is that you have nested the seams as accurately as possible and aligned the long edges as closely as possible.