The Hourglass Quilt Block: Simple, Striking, Timeless
- How to Sew the Nine-Patch Quilt Block
- Perfect Flying Geese Blocks Every Time
- the Vintage Snowball Quilt Block: Simple But Stunning
- Half Square Triangle: A Quilter’s Best Friend
- The Hourglass Quilt Block: Simple, Striking, Timeless

The Hourglass quilt block is a quilting essential every quilter should master. Simple yet versatile, it can stand alone as the star of a quilt or blend beautifully into more intricate patterns. Its clean lines create a sense of depth and motion, making it a perfect fit for both traditional and modern designs.
From star blocks to pinwheels—or anytime you want to add dynamic movement to your layout—the Hourglass quilt block is a go-to unit that elevates any quilt.
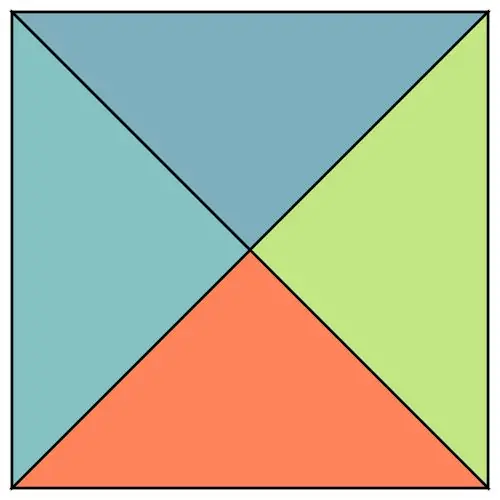
What is an Hourglass Quilt Block?
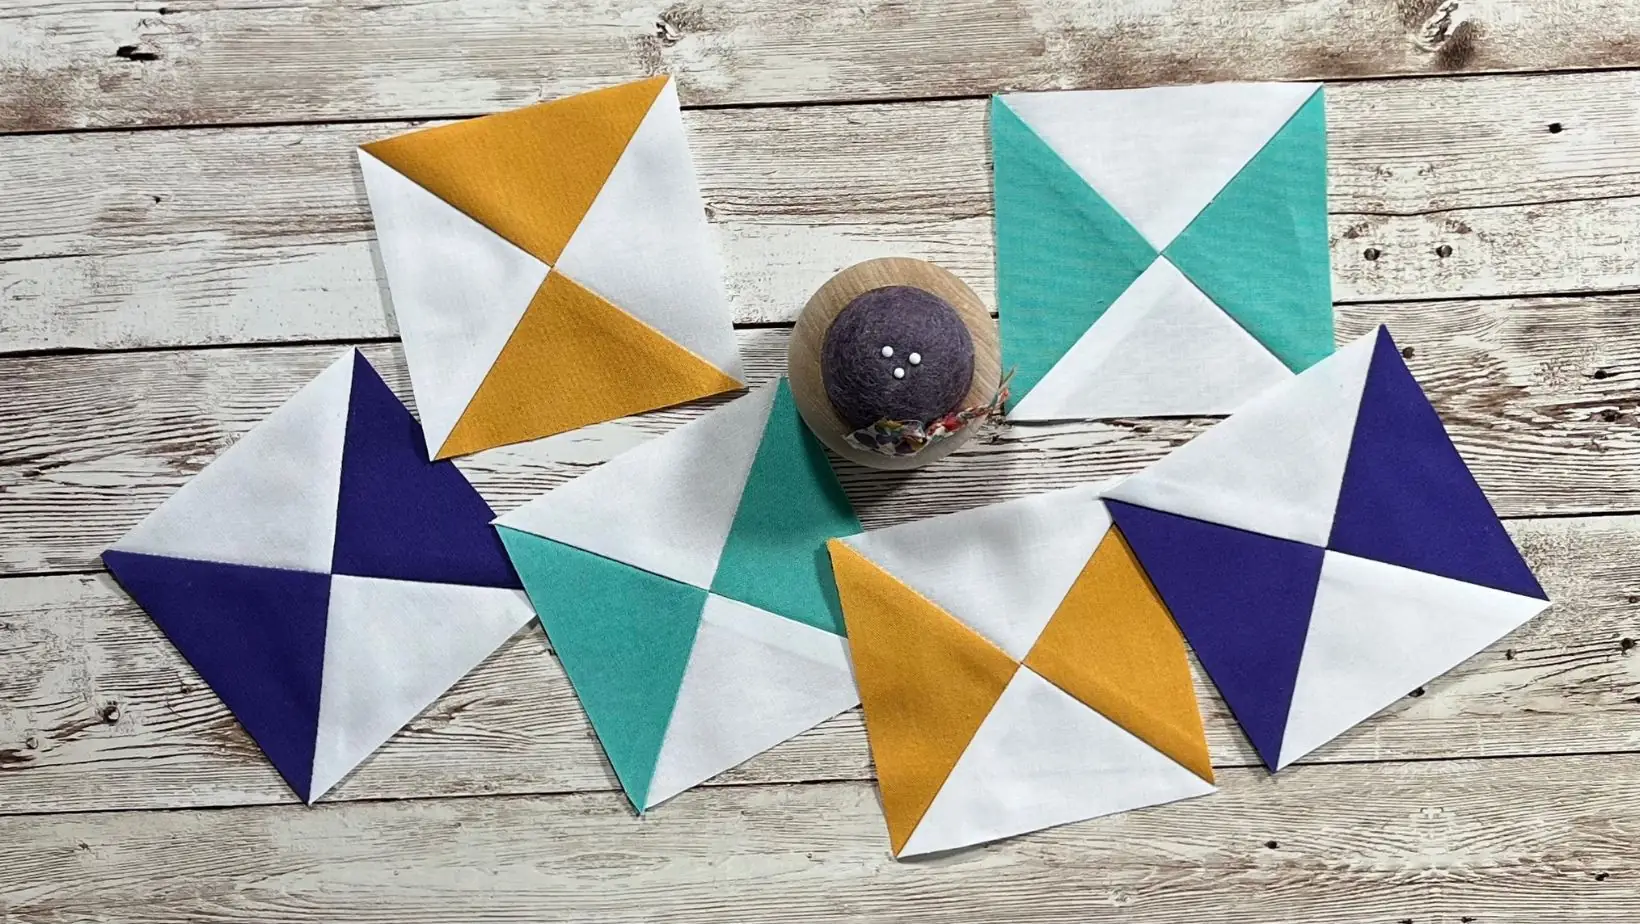
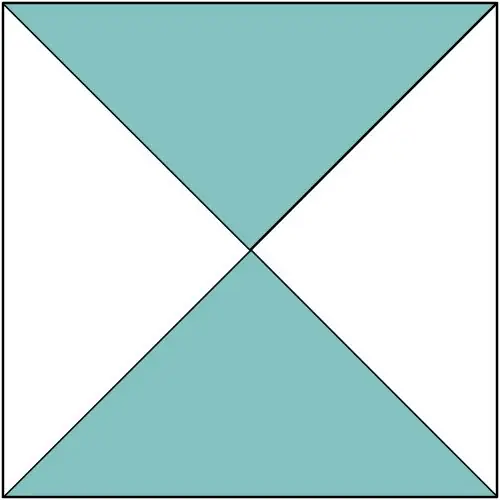
The Hourglass quilt block is essentially four triangles meeting in the middle, creating four equal sections. It’s a two-color version of a Quarter Square Triangle (QST). The effect is a bold, balanced “X” shape that looks great on its own or combined with other blocks.
The Hourglass quilt block may seem like just another building block, but it’s a workhorse in quilt design. Once you master it, you’ll find yourself reaching for it again and again.
Triangles Through Time
The Quarter Square Triangle (QST) quilt block has been around for centuries. Because it’s made from such simple shapes, this block appeared very early in American patchwork history, likely in the early 1800s when scrap quilting and geometric patterns became especially common.
More Than Just a Pretty Shape
The hourglass has long been a symbol of time and the passage of life. For many quilters, it carried more than just design appeal—it was also a reminder that life is fleeting and time is precious. Some historians note that pioneer women used the hourglass motif in their quilts as a form of storytelling, combining practicality with deeper meaning.
Quilting with Scraps and Style
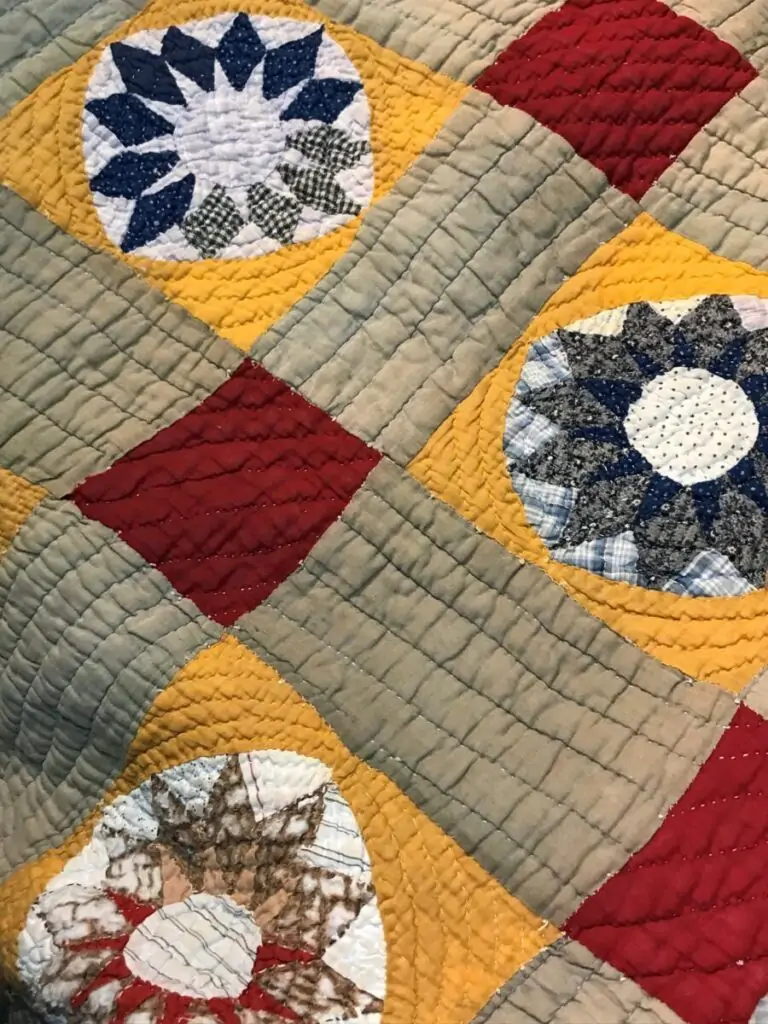
The Hourglass quilt block often stood alone in repeat patterns, but it was just as frequently used as a building block for more complex designs like the Ohio Star of which there are many variations.

Its perfect symmetry made it a favorite in 19th-century utility quilts, especially when quilters were piecing together scraps—this block could be made from even the smallest bits of fabric.
From Bicentennial to Now
During the quilt revival sparked by the U.S. Bicentennial in 1976, traditional designs like the Hourglass quilt block found new life. Today, the Hourglass quilt block remains a go-to choice for quilters. Depending on fabric and color choices, it can read as timeless and traditional or sleek and modern—proof that some designs never go out of style.
And that’s exactly why the Hourglass block deserves a spot in your quilting toolbox—steeped in history, packed with meaning, and endlessly versatile for whatever project you dream up next.
Surprisingly Simple to Sew
Quarter Square Triangles are the natural next step after mastering Half Square Triangles. To create an Hourglass block, you’ll start with just two HSTs. That little trick of making two at once? It’s about to pay off again!
Need a quick refresher on how to make two HSTs at a time? Click here to check out the instructions.
How to Make 2 Hourglass Blocks at Once
Start with two squares of contrasting fabric

Cut a square from each fabric that is 1½” larger than your desired Hourglass block finished size. Example: For a 3″ finished Hourglass block, start with two 4½” fabric squares. (*or use a 5″ charm square for convenience like I did).
Draw Diagonal Line
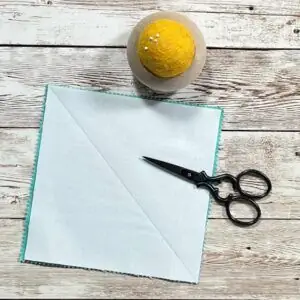
– Place the two fabric squares right sides together.
– Draw a diagonal line from corner to corner across one square.
– Sew ¼” seam on both sides of the drawn line.
Cut between seams

– Cut the fabric squares apart on the drawn diagonal line
Press HST units
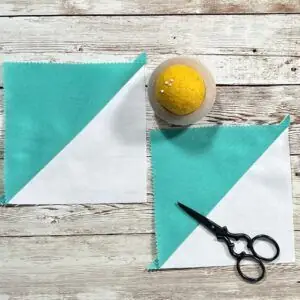
– Open HST units and press seams toward the darker fabric (DO NOT trim)
Nest Seams, Draw, Sew again

– Place the HSTs right sides together, making sure different colors touch.
– Nest the seams
– Draw another diagonal line (corner to corner, perpendicular to your seams).
– Sew ¼” away from both sides of the line.
Cut on Diagonal line

– Cut along the diagonal line
– You now have 2 Hourglass blocks
Press Hourglass Blocks Open

– It is helpful to “pop” the seams where the four seams meet to reduce bulk
– Press one seam in one direction and the other seam in the opposite direction
– There will now be a tiny 4-patch where the seams meet
– Press seams so blocks lay flat
Trim QST Blocks
– Trim the QST units to 3½” (they will measure 3″ when sewn into a quilt)
– Make sure diagonal lines on ruler align with diagonal lines in block before trimming
Tips for Success
Making Hourglass blocks is a lot of fun, and with a few simple tricks, you can take your quilt from good to stunning. Here are some tips to help you get the most out of your blocks.
- Pressing Power: Press seams toward the darker fabric, and “pop” center seams to reduce bulk and help blocks lie flat.
- Trim Time: Careful trimming now makes sewing blocks into larger designs—like the vintage examples below—so much easier.
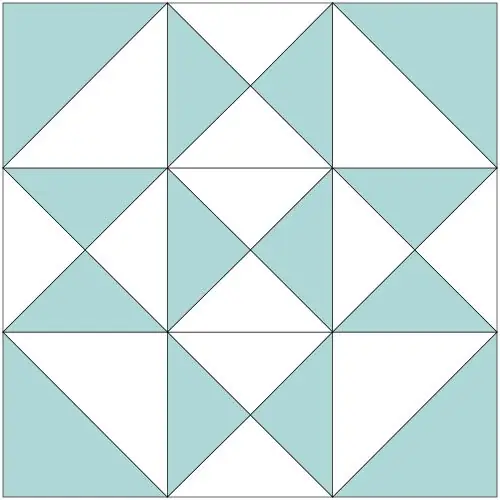
- Layout Magic: Making a quilt entirely of Hourglass blocks? Rotate your blocks to reveal stars, diamonds, pinwheels, and other fun secondary patterns.
- Size Play: Mix small and large Hourglass blocks in the same quilt top for movement and visual interest.
- Color Fun: Experiment with different colors, values, or prints—your blocks will take on a whole new personality!
The best part? There’s no right or wrong—just have fun experimenting until your quilt feels just right.
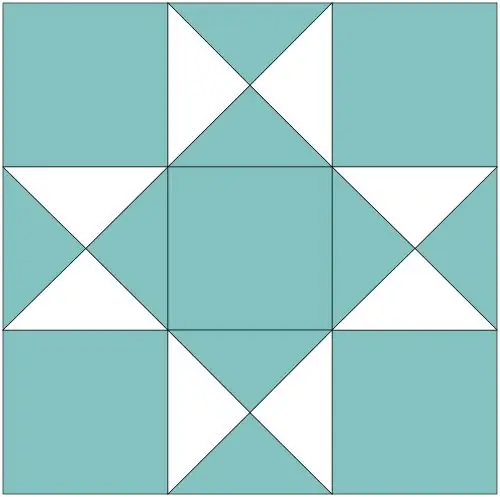
Design Ideas Using Hourglass Blocks
Combine simple Hourglass blocks with solid squares and HSTs to create classic favorites like the Ohio Star, Silent Star, or Triplet blocks pictured below. They’re all built on easy Nine Patch layouts, and the Hourglass units are a breeze to make using the method we covered above.
To make each block shown below finish at 9 inches, start with Hourglass units that finish at 3 inches. Simply begin with two 4½” squares of fabric and follow the instructions we shared earlier—you’ll have perfect blocks in no time!

Why Quilters Love It
- Movement & Direction: The diagonal lines naturally guide your eye across a quilt.
- Endless Variations: By rotating blocks or playing with color placement, you can create stars, pinwheels, diamonds, or secondary patterns.
- Scrappy-Friendly: This block is perfect for using up leftover fabric pieces from your stash.
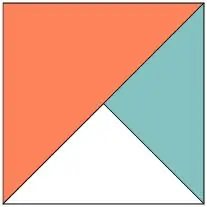
Quarter Square Triangle Color Variations
Now that you’ve got the Hourglass quilt block down, branching out to other Quarter Square Triangle variations is a breeze.
Let’s explore two other fun twists on the classic Quarter Square Triangle block. The Split QST adds a third color, while the four-color version shows how a simple color swap can completely transform the block.
Check out the examples below—you’ll be surprised how different the same block can look with just a little color play!
Feeling inspired to make some QST blocks? The Bonjour Quilts blog has a super handy chart with all the fabric sizes you’ll need—no guessing required!
Final Thoughts
Time to grab your favorite fabrics and dive into a few Hourglass blocks—you might just get hooked! Mix colors, rotate blocks, play with different sizes, and watch all kinds of fun patterns appear. Before long, you could be dreaming up a whole quilt built around these versatile blocks.
Remember, there’s no right or wrong here—just creativity, fun, and the joy of seeing your quilt come to life, one block at a time.
Looking for a quick and easy project? Our Use-it-Up Layer Cake Hourglass pattern turns a single layer cake and a bit of yardage into a beautiful quilt top!