The Use-It-Up Layer Cake Snowball Quilt
Use the Entire Layer Cake
That’s right. All you need for this easy little Layer Cake quilt is one layer cake and some yardage (approximately 2 yards) for the background. So, pull that layer cake out of your stash. You know, the one you’ve been saving for just the right pattern. Then, let’s get going.
The layer cake I used for this quilt is from the fabric line ‘Grandale’ by Keera Job for Riley Blake. Such a beautiful fabric line. The name intrigued me too. What did ‘grandale’ mean I wondered. So, I searched the internet and learned that there is a Grandale Manor in my home state. According to the historical information on the Grandale Manor website, it was used as a hospital during the Civil War and was also part of the Underground Railroad.
I’m not sure why the designer used the name, but I love that the name matches that of an historic site near me.
But enough of that. I had been saving this layer cake for just the right quilt project. I didn’t want to cut up the fabric or waste any of it. Every bit of the layer cake is used for this quilt and Snowball blocks are a great way to use large scale fabrics.
Finished size (approximate): 48″X76″
Cutting Instructions
- Set aside 15 layer cake squares that you will use for the center of the Snowball blocks. Hint: Choose the large prints or your favorite designs for this step.
- Next, cut your background fabric into six 4-inch X Width of Fabric (WOF) strips. Then, sub-cut those strips into sixty 4 X 4-inch squares.
- Cut your remaining layer cake squares into 2.5-inch strips for a total of 108 strips. **Note: I chose not to do this step immediately. I thought I might change my mind about the squares I set aside in step 1 as I assembled the quilt. So, I cut strips as I needed them for each block.
Snowball Block Construction
Total Time:
Prepare your 4 X 4-inch squares for sewing
Draw a diagonal line (A) from corner to corner on each of the 4 X 4-inch squares of background fabric. Now, draw another diagonal line (B) on each of the 4 X 4-inch squares that is 1/2-inch away from line A.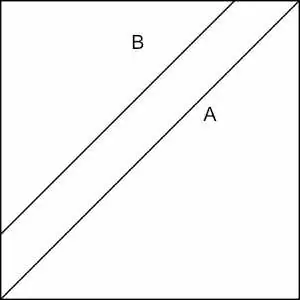
Creating the Snowball Corners
Grab one layer cake square. Lay a 4 X 4-inch square on each corner. Make sure line B is closest to the outside edge of the Layer Cake square. Sew on both diagonal lines (A & B) on each of the 4 X 4-inch squares on the corners. The red dashed line in the image below represents the line on which you will cut in step 3 below.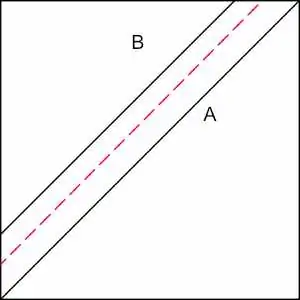
Cut to finish the corners of the Snowball block and 4 HST units
Cut between your sew lines. Voila! You just made a Snowball block and four little HST blocks. If you’ve never used this magical method to create HST blocks from what would otherwise be wasted fabric, you’re going to be using this everywhere soon.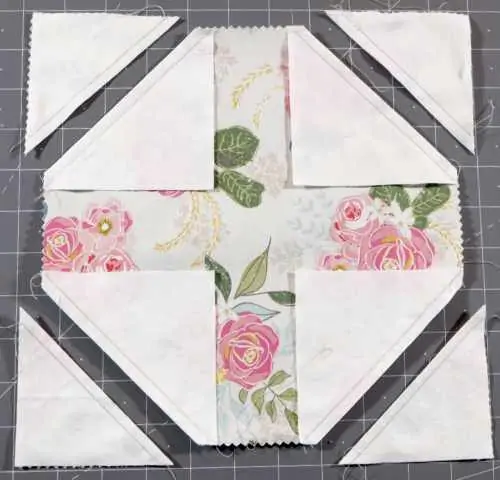
Press the corners of the Snowball block open and press the 4 HST units open
It is easiest to press the corners of a Snowball block toward the background fabric. The HST blocks can be pressed open toward the printed fabric.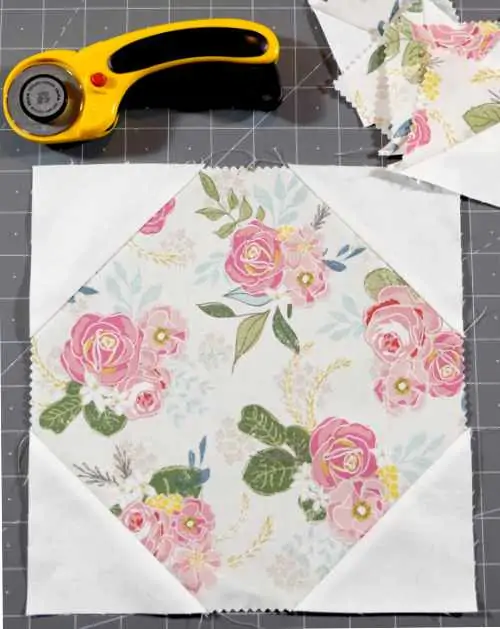
Trim the HST blocks
Trim the half-square triangle blocks to measure 2-1/2-inches square. Set them aside (you will use them later).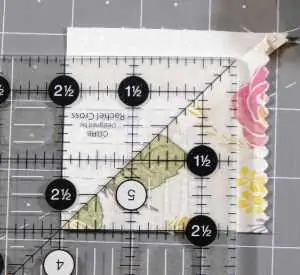
Repeat steps 1 – 6 for each of the 15 Layer Cake squares you set aside
When you are finished with this step, you will have fifteen Snowball blocks and sixty 2-1/2-inch half square triangle (HST) units
Bordering the Snowball Blocks
Now grab all the Layer Cake squares that you did not make into Snowball Blocks. Cut each of them into four 2 1/2-inch strips. Use the strips to border your Snowball blocks. You will need [4] 2 1/2″ X 10″ inch strips for each Snowball block.
- Sew two 2-1/2 X 10 inch strips to either side of a Snowball block.
- Sew the half-square triangle blocks to each end of the other 2-1/2″ X 10″ strips. NOTE: I suggest you lay out the block first. Ensure that all your colored triangles point in the same direction and then pin to the ends of the strips before sewing.
- You can mix up the HST blocks or use the ones that match the fabric used for the Snowball. It’s your design, choose the look you like best.
- Finally sew the strips with the half-square triangle blocks to each of the remaining sides of the Snowball block
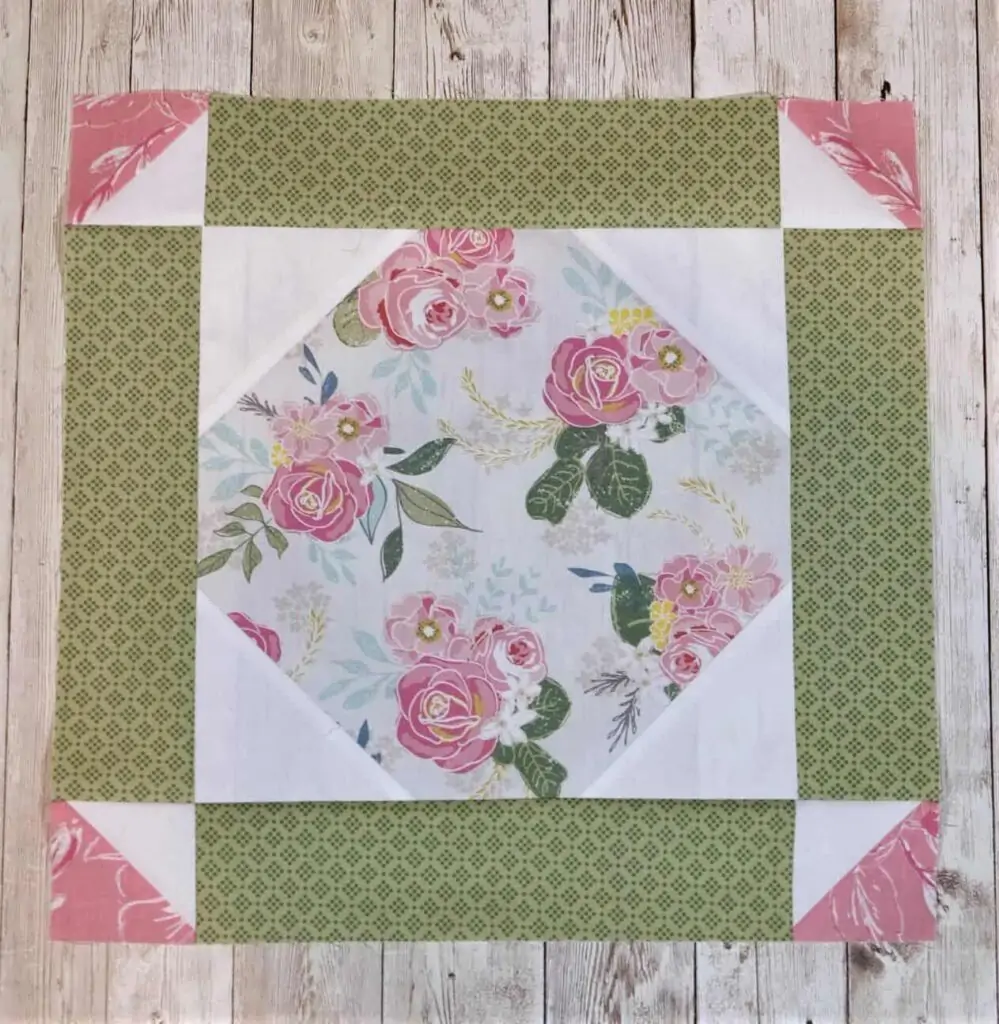
Once you have finished bordering your 15 Snowball Blocks, you are ready to square them up and assemble the quilt top.
Assemble the Use-It-Up Layer Cake Snowball Quilt
My original plan was to simply sew all the finished blocks together to create the quilt top. But, I decided that the design looked better with just a little space between blocks. The top was just too busy with all the blocks next to each other. You do what you like best based on the fabric you use.
I cut nine 1-1/2 inch X WOF strips of background fabric for the sashing. It was just enough to set the blocks apart and make them stand out. (Tip: Great place to use pre-cut 1 1/2″ strips).
I cut eight strips of 3-1/2 inch X WOF background strips to use for quilt borders. I like using a little background fabric to create borders on most quilts because it makes the binding stand out. Also, it prevents the binding from cutting off the overall design of the quilt top. That is just my preference though.
Finally, gather all the remaining 2-1/2 inch strips which you cut from your layer cake blocks and join them with a diagonal stitch to create a scrappy binding.
Purchase the Pattern
If you prefer a complete pattern, we have both downloadable and printed versions.
The full pattern includes
- List of all fabric requirements (blocks, borders, binding, backing)
- Instructions to make the blocks and assemble the quilt top
- Full-color diagrams
- Additional instructions for sewing the borders, backing, and binding
More Use-It-Up Layer Cake Patterns
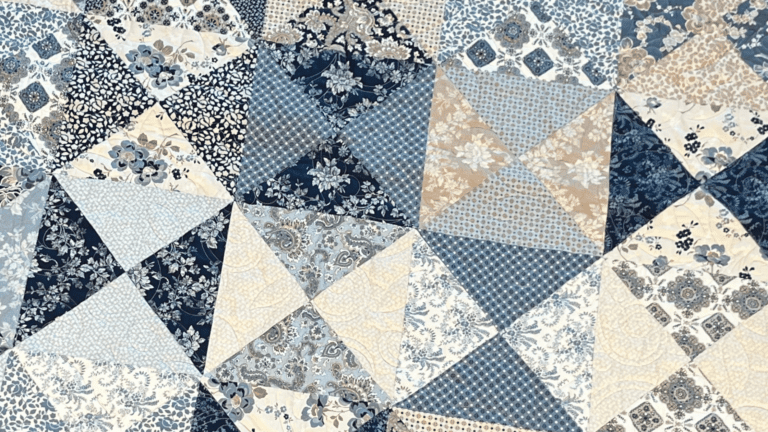
Take a look at our Use-It-Up Layer Cake Hourglass blog post.
Try a Use-it-up Jelly Roll Pattern
Take a look at our Use-it-Up Jelly Roll Pudding & Pie blog post.