Perfect Flying Geese Blocks Every Time
A Charming Little Block
What is it about Flying Geese Blocks? Adorable little rectangles with a triangle in the middle. The large triangle in the middle is often referred to as the ‘goose’ while the triangles on either side are said to represent the ‘sky’. Line them up across a quilt top or use them in combination with other shapes. It makes no difference. They add movement and just a bit of drama to any quilt design.
However, they look deceptively easy to make. If you struggle making Flying Geese blocks like I did, keep reading. But before I show you how I easily make beautiful Flying Geese blocks with precision, let’s learn a bit about the block.

The history of the Flying Geese Block
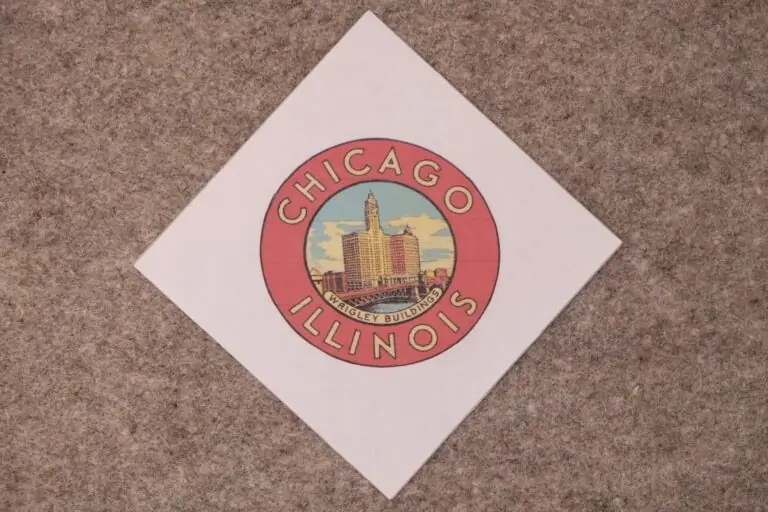
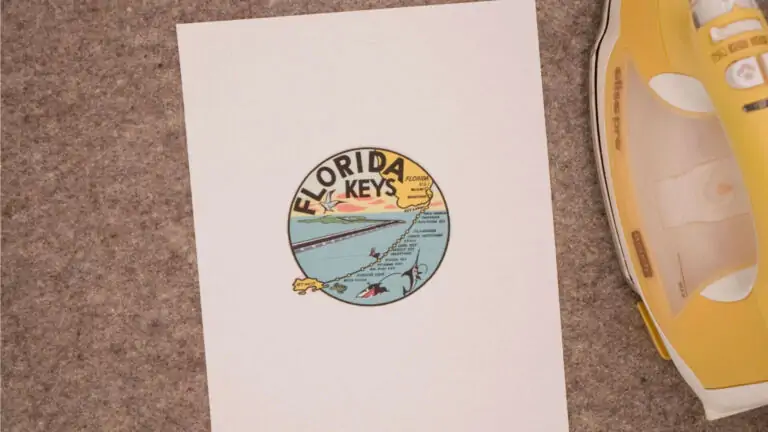
There are many blocks that have the name ‘Flying Geese’. All of the blocks contain the basic shape that we refer to as the Flying Geese block. You can see a few examples of vintage quilt blocks with the name ‘Flying Geese’ below.
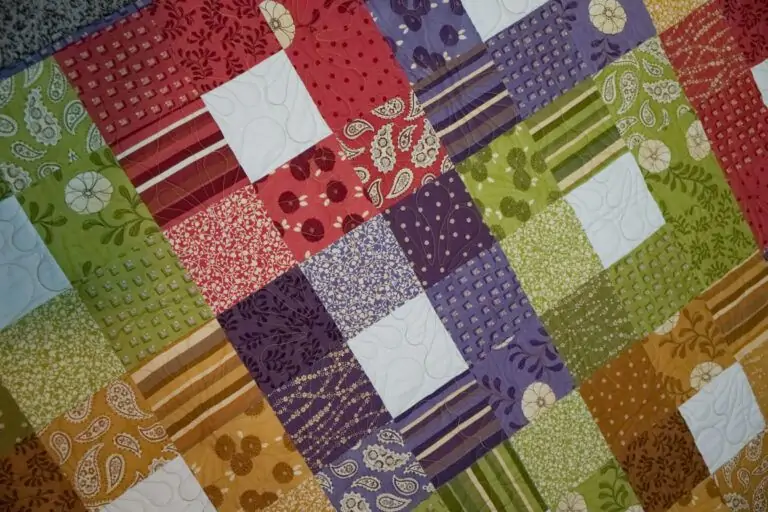
However, when I think ‘Flying Geese’, I picture the layout I first saw in the Quilter’s Complete Guide by Marianne Fons & Liz Porter. That was the quilting book we used as a reference when I took my first quilting class. And it is the same block layout used in the quilt below which is part of the Metropolitan Museum of Art collection. Per the museum notation, this particular quilt is thought to have been sewn over 180 years ago.

As time went by, the possible arrangements for this unit grew with quilters’ imaginations. For example, the blocks below are all named ‘Flying Geese’ by one source or another. Yet, all the blocks demonstrate unique arrangements of this simple unit. And there are so many other vintage blocks that contain Flying Geese units. Once you master this little block, you can make hundreds of different designs.


It Looks Deceptively Easy
So, it looks easy right? I mean how hard can it be to sew a triangle on either side of a rectangle then press them back? Apparently, not as easy as it looks. Making a block that is even on opposite sides and has a 1/4-inch seam allowance above the point on the ‘goose’ can prove a bit harder than you might think.
tips and Tricks and Templates
There are lots of tips and tricks out there. One tip suggests drawing a diagonal line from corner to corner on a fabric square that will become the ‘sky’ piece, then sewing very slightly to the right of it. The idea being that just that extra bit of space will make the corner edges even with the rectangle when pressed back. So, I found that it worked for me sometimes, but just as often it did not. I started folding the corners back before trimming to be sure the block was straight. But, I ended up ripping out far too many the stitches.
I tried making one block at a time using a rectangle and two triangles (Creative Grids® Folded Corner Clipper method). Then, I discovered the method for making four Flying Geese blocks at a time. So, that’s the secret I thought. It is not.
There are foundation paper piecing methods, templates, and tricks galore. I’ve concluded that there must be a lot of quilters who struggle when making the Flying Geese block.
Find What Works for You
I avoided patterns with Flying Geese blocks for a long time. Sometimes, I resorted to using two half-square triangles to make a flying geese block.
But, it bothered me that I could not master this ‘simple’ block. If you haven’t yet found the ‘magic’ that works for you, just keep trying different things. I finally found the tool that worked best for me, but I tried a lot of techniques and other templates to get there.
The Ultimate Tool for Me
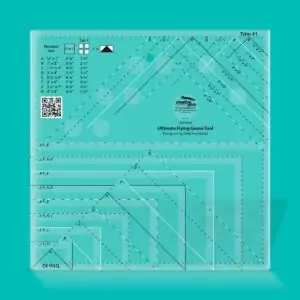
I finally found the The Ultimate Flying Geese Tool from Creative Grids®. I can now make a Flying Geese block that is ‘square’ and has the perfect seam allowance on all sides. No worries about cutting off the points when I sew it into a quilt.
This particular tool includes instructions for making 4 Flying Geese blocks at one time as well as instructions for the standard method of one block at a time. The four-at-one-time is my favorite now because I rarely need just one block.
I especially love this tool because you can make 8 different sizes of Flying Geese blocks. Even more convenient is the fact that the fabric cuts needed to make each size block are listed on the tool. No hunting for measurements or experimenting required.
The secret is in the trimming. If you make the block just a little too big (as the tool has you do), it can be trimmed to perfection.
How I Use the Ultimate Flying Geese Tool®
Make 4 Flying Geese At Once
-

I’m making Flying Geese Blocks that finish at 2″ x 4″ inches. Per the guidelines on the ruler, I need one fabric square (goose) that is 5-3/4″ square and [4] fabric squares (sky) that are 3 1/4″ square
-

Place large fabric square right-side up on flat surface and place [2] small fabric squares right-side down on larger fabric square as shown. Draw diagonal line on fabric squares. Now, sew 1/4″ away from the line on both sides of the line.
*I use my Creative Grids® 15-inch seam guide to draw two diagonal sew lines on the fabric instead. -

Measure 1/4″ away from one of your sewn lines and cut the unit in half as shown. Or, if you drew a single diagonal line in the step above, simply cut along that drawn line.
-

Press the small triangular pieces away large triangular piece in each unit. Units should resemble hearts as shown
-

Finally, lay each remaining 3-1/4″ fabric square on units RST as shown. Draw diagonal line from point to point or use the seam tool to draw two sew lines on each unit. Pin and sew as you did above
. -

Cut between your sew lines as you did above. You should now have 4 untrimmed Flying Geese Blocks. Press the remaining triangular piece on each unit back.
-

You should now have 4 Flying Geese Blocks that can be trimmed to perfection using the Ultimate Flying Geese Tool from Creative Grids®
-

Position one of your Flying Geese Blocks so that the tip of the ‘goose’ is at the top. Lay the tool on top of the block so that ‘Trim #1’ is right side up in the top right-hand corner. Now, find the letter which represents the block size you are making. For example, “D” represents the 2″ x 4″ block I’m making. The lines of the “D” triangle should match up with the outline of my ‘goose’ as shown above. Trim the right and top sides of the block.
-

Turn both your Flying Geese Block and your ruler 180 degrees. Place the ruler on your block again. ‘Trim #2’ label should now be right-side up in the top right corner. Now, line up the horizontal and vertical lines (in my case lines labeled 2″ x 4″) with the left and bottom edges of your block. Note that there is a ‘D’ triangle on this side of the ruler as well so I can make sure everything is square. Trim the right and top edges. Repeat the process for the remaining blocks.
-
Admire your beautiful blocks!
Tools:
- Creative Grids Ultimate Flying Geese Tool®
- Creative Grids 15-inch Seam Guide Tool®
- Rotary Cutter
More Blocks with Flying Geese
Now that you can make perfect Flying Geese Blocks four at a time, why not try making some of the blocks below?


Just for Fun
If you struggle with making Flying Geese blocks, I hope this tool gives you a new option. I’ve found that making blocks just a little bigger than required and trimming them down to the needed size is sometimes the key to ‘perfection’.
Tools Used in this Post

.